
How To Put Your Video On VHS

So you have a video you want to put on a VHS tape. Maybe it’s an art project, a lo-fi short film, or a delightfully obtuse calling card. Others may call you crazy but not me! Let me be your tape sherpa on this expedition to transcend the boundaries of digital video, eschew the conveniences of today, and send your videos back in time. Together we can pull this off, so hang in there.
Overview
To turn your video into a nostalgic mess of grain and fuzz, you are going to need a few things. Red Giant Universe (or any plugin) is not one of them. We’re doing this the real way. While plugins and software solutions can make things look pretty good, they’ll never match the real thing. It’s not the same as holding a real VHS in your hand and knowing it has your movie on it.
What You’ll Need
Most of these items are VERY affordable, but depending on what you have on hand the costs may add up. Alright, let’s dive right in with a list of must-have items to get your video onto a VHS tape:
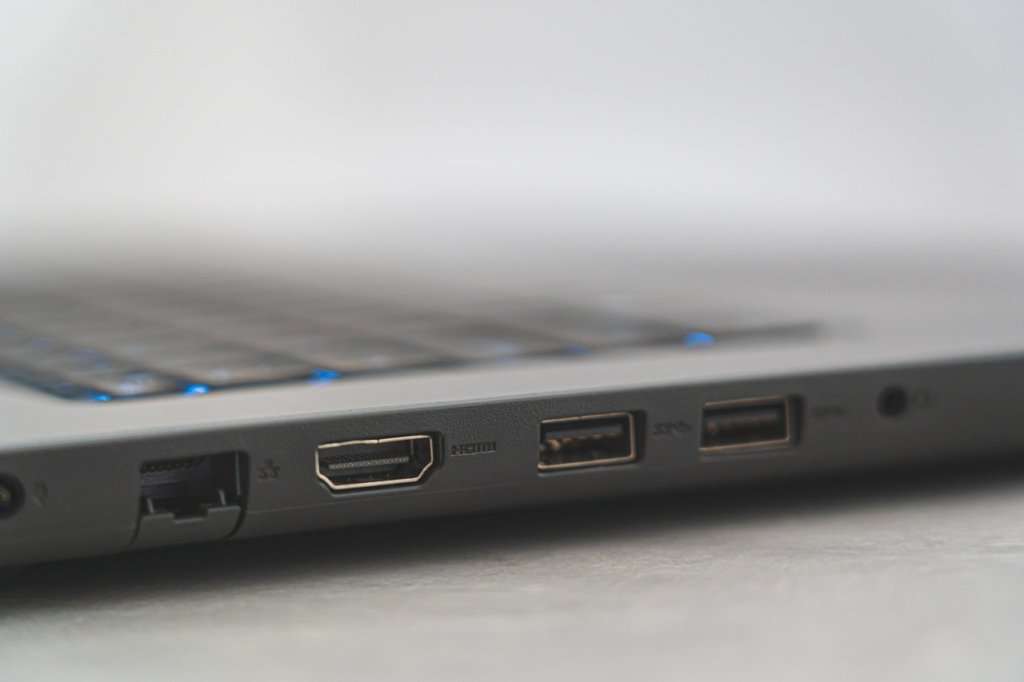
NOTE: For this guide, I will assume your computer has an HDMI output on it. At the end of this article, I’ll cover what to do if you don’t have an HDMI output so stay tuned.
- VCR ($5-10 at your local thrift store)
- Blank Tapes (These will be around 50 cents at your local thrift store)
- The VCR Manual (Free PDF online)
- VCR Remote, or Suitable Universal Remote (Free if it came with the VCR, or if your universal remote has the right buttons. Otherwise you may end up shelling out 80-100 dollars for something like this depending on where you are in the world)
- HDMI to RCA Converter Box ($10-20 on amazon)
- A Television With an RCA Input (If your TV doesn’t have them then add another $10-20 for a CRT tv at your local thrift store)
- 2 RCA Cables (You or someone you know has these laying around. worst-case scenario, expect to pay around 5-10 bucks for these online)
- 1 HDMI Cable (You have one, please don’t buy one. If you somehow can’t find one, just buy a cheap one at your local dollar store)
- 1 mini USB cable (Again, you’ve got one. I promise. But if not, just add this to your dollar store shopping list)
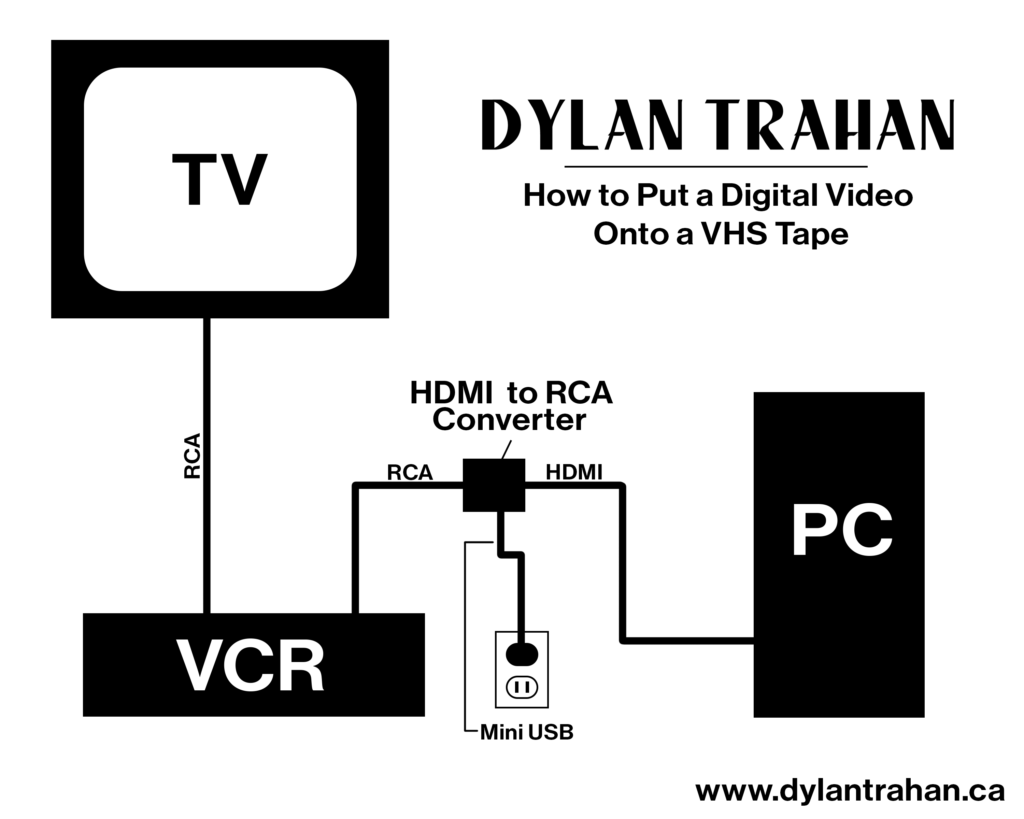
- The Handy Diagram Below (Keep this on hand and refer to it often!)
Step One: Get a VCR
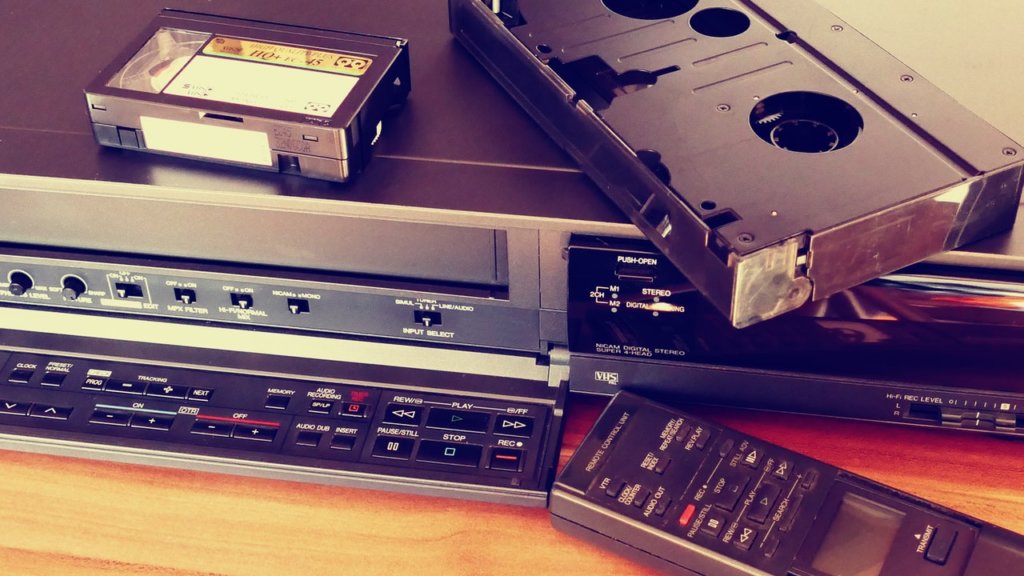
First, you need to find a VCR. You may have one gathering dust in your basement, or if you’re like me you already have one connected to the TV in your office. If, however; you are embarking upon this endeavor with not a VCR to your name, fear not. Every second-hand store has them coming in and out all the time. If you make the rounds and can’t find a VCR, just call around to family and friends and ask them if they have one laying around. I guarantee they aren’t using it. Worst case scenario you need to turn to the internet. But don’t fret! There is a thriving VHS collecting community online and there’s a good chance someone is selling (or even giving away) one of their many hoarded VCRs on your local buy and sell page. Once you’ve got that sucker, move onto the next step.
Step Two: Setting Up Your VCR
There are a few things to consider when setting up your VCR. If you have a desktop computer that isn’t particularly mobile you are going to need to set up your VCR near your computer. That means you are going to need a TV nearby. So, if you already have one in there you are good to go! Otherwise either take the computer to the TV or vice versa. If on the other hand, you have a laptop, well congratulations! You can go ahead and set up your VCR wherever the hell you want!
Now the next consideration you’ll need to make, is whether the TV you intend to use has any RCA inputs. Some newer TVs have completely done away with them but many still have one lone RCA input. Probably for the DVD players, and VCRs still rotting away under many a home entertainment center. If you are one of the unlucky bunch who no longer has any RCA inputs then you’ll be heading back to the thrift store. Grab the cheapest and smallest CRT television you can find. If you do this kind of thing often that old TV is going to become a fixture of your office or workshop right next to your computer. So grab something that isn’t going to take up too much space.
Alright, now you’ve got a TV to plug into. This is where the first of those two RCA cables is going to come in handy. You will need to plug the output of the VCR into your TV. If you have a VHS on hand, go ahead and toss that puppy in your VCR to test it out. If you don’t have any VHS movies anymore, don’t worry. Playback isn’t our main concern since the TV is just for monitoring the input that we will be setting up in the next step. As long as you’re getting that glorious blue screen, then you are ready to move on to the next step.
Step Three: Tracking Down A VCR Manual Online
This step won’t cost you anything but it could take time. So first of all, why do we need the VCR manual? You might not. The reason I think you should have it is for ease of use. If at any point you do need to do any trouble shooting you’ll be glad you have it. If you know your VCR like the back of your hand then: Congratulations! You can go ahead and move on to the next step.
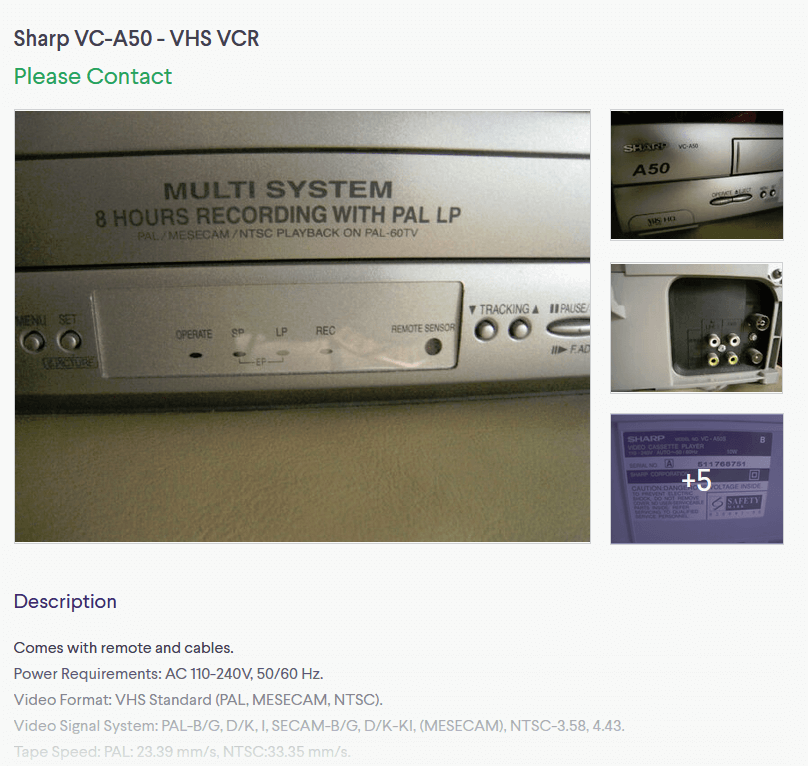
For everyone else, let’s say I’ve grabbed this lovely VCR available right now from a seller near me (it even comes with the remote, which will come in handy later). Unfortunately, the seller doesn’t have the manual. So we turn to the internet. Let’s try this together. Head over to Google and type in the model number followed by the word manual. I’ll wait.
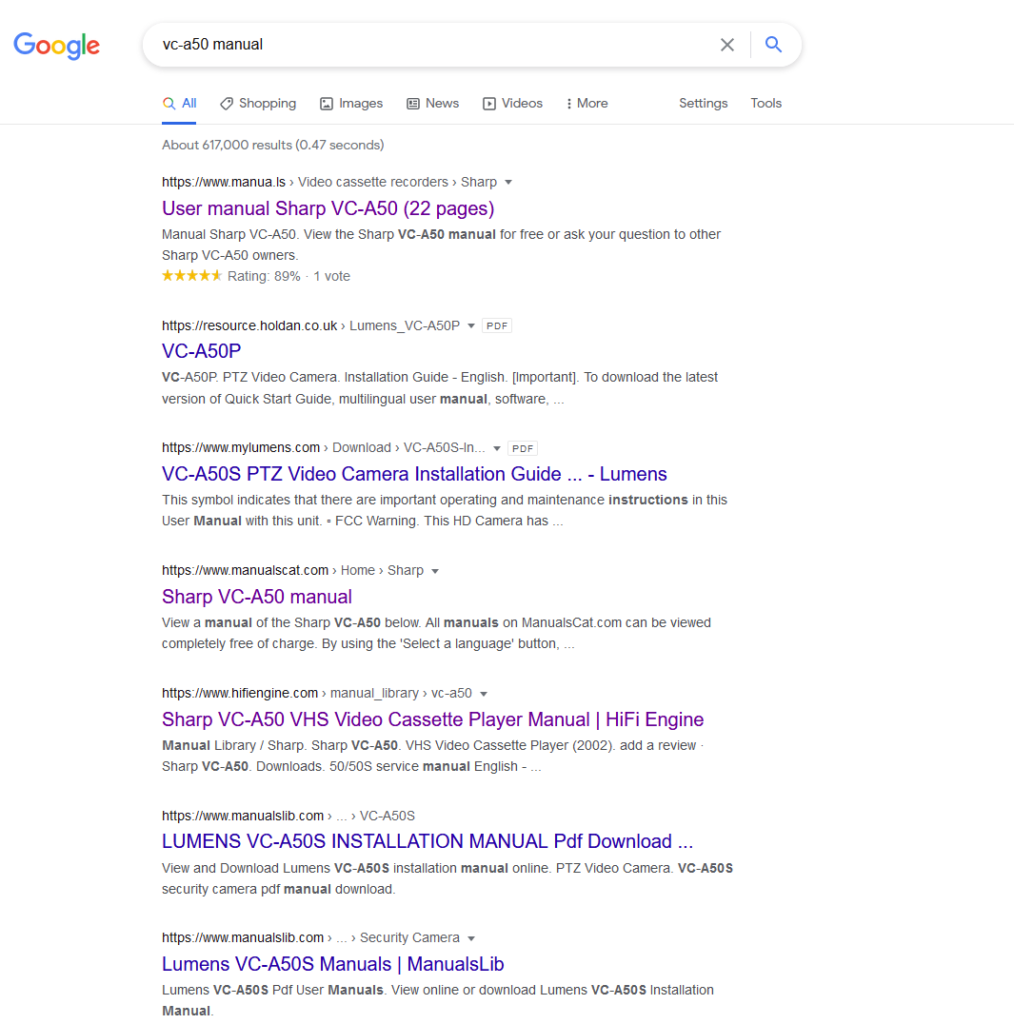
Magical right! You can find a manual for almost anything online. If for some reason you are having trouble finding yours, or you want a downloadable file to keep on hand, check out this awesome article for a list of trustworthy sources for manuals online. Alright, let’s move on.
Step Four: Plugging Your Computer Into Your VCR
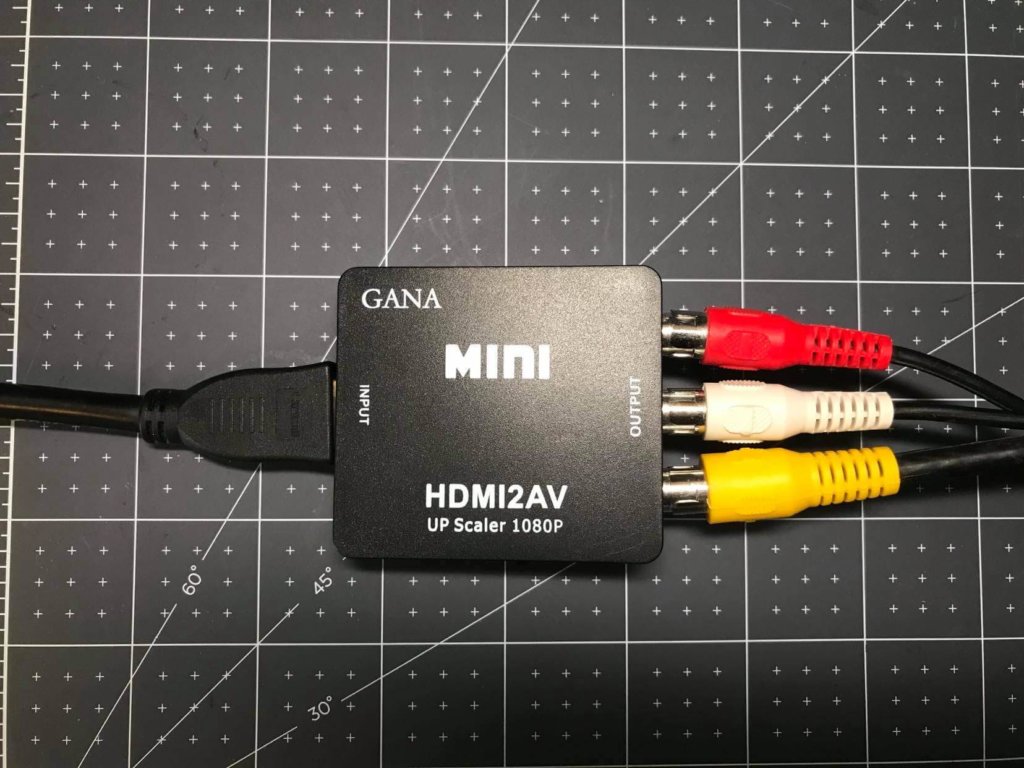
Okay so we’ve got our VCR setup AND we have our manual to help troubleshoot any problems we may run into. By now you should be feeling perfectly equipped to take on any troubles you may face. It’s time to grab our HDMI to RCA converter. An important note: Be very careful when ordering. You do not want to get an RCA to HDMI converter. They don’t work both ways.
Once you’ve got it, go ahead and plug one end of your HDMI cable into your computer’s HDMI output. Then connect the other end to the input end of the converter box. Then we’ll take our RCA cables and plug them into the output. That should look like this:
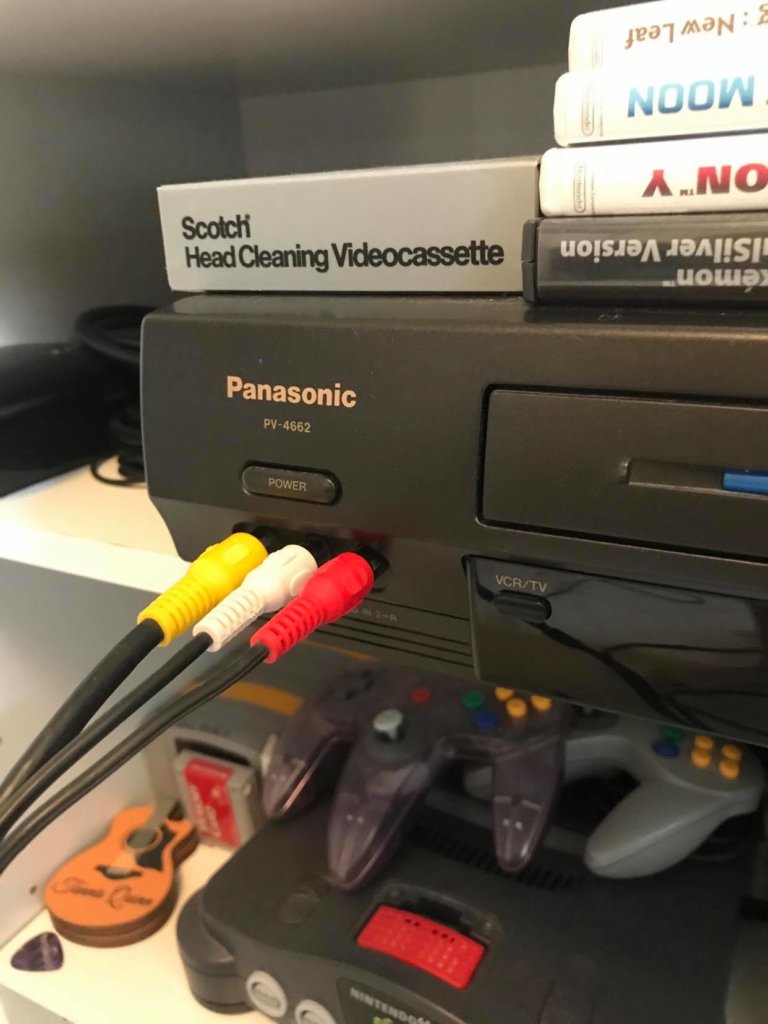
The other end of your RCA cable will go into your VCR’s Input. Some VCRs have inputs on the front for ease of access and others have them on the back. Mine happens to be on the front.
The last thing to do is power up your converter box. You may find that it is already working and showing your computer monitor on the screen. If so then yours doesn’t need it. I’m not sure exactly why that is, but if that’s the case, YAY! If you do need to plug it in you should see something like this on the side.

Just grab that mini USB cable we mentioned earlier and plug it into a USB port on your TV, computer, or a wall wart you have laying around. While you are plugging it in go ahead and flip that PAL/NTSC switch to match your region. If you are in North America, or parts of South America your VCR is almost certainly an NTSC device. If you are almost anywhere else in the world you’ve probably got a PAL device. If you are a video creator you’ve probably already run into these video standards. We won’t go into the difference here but if you want to learn more check out this awesome article.
Step Five: Record Your Video Onto A VHS Tape.
Alright, we’re past the hard part, the rest is fun! At least if your computer cooperates. You may need to dink around in your computer’s display settings to get your second monitor showing up through the VCR. You also may need to mess with the aspect ratio to get everything showing up on your screen. That will all depend on your computer, OS, and the display you have your VCR connected to. Running into issues? DM me or @ me on twitter and I’d be happy to try and help out where I can.
Once you’ve got your monitor up on the screen go ahead and pop a blank tape in your VCR. Now it’s going to be as simple as playing your video in full screen in your video player of choice and hitting record on your VCR remote. If you’re having trouble getting your VCR to record just make sure to reference your handy-dandy Manual. I suggest doing a test recording and then rewinding your video and playing it back before committing to a longer recording. Nothing is worse than wasting hours recording something to tape only to realize it didn’t work.
If you’ve got your video onto a tape, congratulations! If not let’s look at a few places your set up may differ from this guide.
Step Six: Other Stuff

First, let’s address the video output problem. Not everyone has an HDMI on their computer, so you may need to track down a cable that goes from VGA, DVI, or display port, to HDMI. All of those are readily available online (and at your friendly local computer store). I won’t link to all of them here but grab one of those and you will be all set.
Next, let’s talk about taking a video you have on DVD and putting it on VHS. Good news! You can skip most of the steps and just connect your DVD player with RCA cables right to your VCR! From there everything else is easy as pie. In fact, if you don’t want to do all of the steps listed above you can burn a DVD, put it on your DVD player, play your movie, and hit record. Simple as that.
I’m sure there are other problems worth addressing here, and I will do my best to update this article as people bring them to my attention. For now though, happy VHS-ing friends!
Don’t forget to follow me on your social platforms of choice:
Twitch: @villaintrahan
Twitter: @DylanTrahan
Facebook: @DylanCTrahan
YouTube: https://bit.ly/2NOvhJo
